
Hey longboard enthusiasts! Do you still remember the exhilarating feeling of freedom when you first stepped onto a longboard?
A well-maintained longboard can not only make every ride silky smooth, but also safely and reliably accompany you for 5 to 8 years. However, if neglected, it may start to feel off within a few months, and even become unsafe without you noticing.
Don’t worry, it sounds complicated, but longboard maintenance is actually much simpler than you think! You don’t need to be a professional mechanic or have special tools. Most routine maintenance can be done in under 10 minutes.
Treat this guide like an old friend, as it will teach you step-by-step how to care for your beloved board, ensuring it’s always in top condition and making every ride a joy.
In this guide, we’ll break down the six core maintenance areas of a longboard in detail: from adjusting the brackets to cleaning the bearings, and protecting your board surface.
We’ll tell you how often to perform maintenance and what minor problems might arise if you neglect them. Ready? Let’s get started!
How often do your longboards need servicing? A clear maintenance schedule.
Just like your car needs regular maintenance, your longboard also needs some regular “care.”
The good news is, this doesn’t require a lot of time. Here’s a simple maintenance schedule to help you easily manage it:
| Maintenance frequency | Maintenance content | Why it is important |
|---|---|---|
| After each glide | Visual inspection : Quickly check whether the bracket nuts are loose and whether the wheels are obviously damaged (such as broken). | Ensure that every glide is safe and secure. |
| Every 2-3 weeks | Regular cleaning : Wipe dust and dirt off the plate and wheels; check the tightness of the bracket nuts. | Prevent dirt buildup from affecting performance; ensure the bracket is stable and avoid speed fluctuations. |
| Every 1-3 months | Bearing care : Clean or replace the bearing; check for sandpaper wear. | Keep the wheels spinning smoothly to reduce resistance; ensure sufficient grip to prevent slipping. |
| Every 6-12 months | In-depth inspection : Check the board surface for delamination or cracks; assess the wear of the wheels and consider replacing them. | Extends the life of the board surface and prevents structural damage; evenly wears the wheels, extending their service life. |
| As needed | Parts replacement : Replace sandpaper, worn wheels, or rusty bearings. | To ensure optimal performance and safety, replace components promptly when they reach the end of their service life. |
See? It’s simpler than you thought. Most maintenance is just quick checks and cleaning, requiring absolutely no effort.
Stent adjustment—a common repair procedure that beginners often overlook.
Does your longboard feel wobbly at high speeds? Or does it feel locked up and inflexible when cornering? This is usually your kickstand crying for help!
The kickstand is a core component that determines your cornering agility and gliding stability. Adjusting it properly can make your longboard feel like it was custom-made for you.
Symptom diagnosis:
- If the board feels “unstable” or “wobbly” while gliding, the support frame may be too loose.
- The board is not flexible when turning and feels “stiff” → the bracket may be too tight.
- If you hear a “click” or “squeak” sound when turning, it may be due to worn or dry shock absorbers.
How to adjust the bracket:
Don’t worry, this is one of the simplest maintenance tasks, usually only taking 2 minutes!
- Tools needed: You will need a T-shaped tool.
- Adjusting the spindle nut (Kingpin Nut): This is the large nut in the center of the bracket.
- Tighten: Turning the nut clockwise will tighten the bracket and make the plate more stable, but it will reduce the turning sensitivity.
- Loosen: Turning the nut counterclockwise will loosen the bracket, making the plate more flexible to turn, but it may be less stable at high speeds.
- Tip: Tighten only 1/4 turn at a time. After each adjustment, stand on the board to feel the fit until you find the most comfortable setting. For beginners, medium tightness is a good starting point. As your confidence and skill grow, you can gradually try loosening it to enjoy more flexible turns.
Bushings Replacement:
Bushings are polyurethane (PU) rings around the main shaft of the ride that bear the stress with every turn. Depending on your riding frequency, they will typically wear out within 6-18 months.
- Replacement signal: Even if you tighten the bracket, if the board still feels “loose” or keeps making “creaking” noises, it is very likely that the vibration damping pads need to be replaced.
- Solution: Replace with a new set of shock absorbers, which typically cost between $5 and $15.
- Hardness selection:
- Hard damping pad (90A+): Suitable for heavier skaters or skaters who prefer stability.
- Soft shock-absorbing pads (78A-85A): Suitable for lighter skaters or skaters who prefer agile turning.
How to clean your long plate bearings (step-by-step guide)
Bearings are one of the most easily overlooked yet most crucial components on a longboard. They determine how freely your wheels can spin.
Dirty bearings not only make each push-off more difficult but also produce annoying noise, significantly diminishing your gliding experience.
Signals that bearings need to be monitored:
- The wheels make a “creaking” or “rustling” sound when they rotate.
- After pushing off the ground, the wheel quickly came to a stop (instead of rolling freely).
- You can hear a distinct “whooshing” or “grinding” sound.
- One wheel turns significantly slower than the others.
How to clean bearings:
Cleaning bearings is simpler than you might think, but it requires patience and the right tools.
Required tools:
- Skateboard T-tool (for removing wheels)
- Bearing remover (or flathead screwdriver, used to pry out bearings)
- Isopropyl alcohol (91% or higher) or specialized bearing cleaner
- tissues or a clean cloth
- a light lubricant (such as Speed Cream or 3-in-1 engine oil— do not use WD-40!).
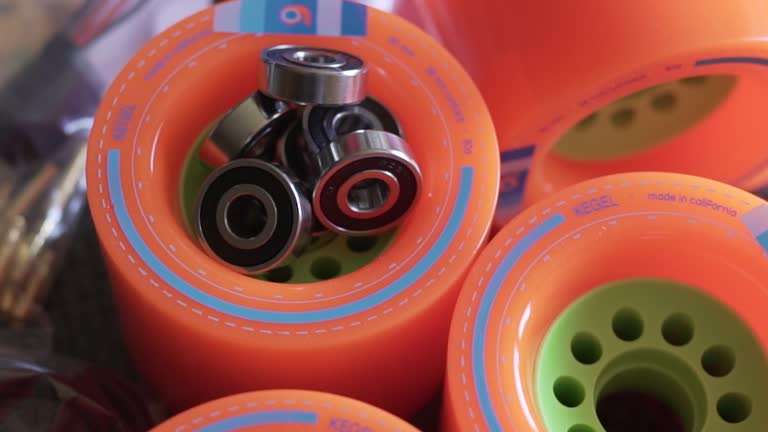
Step-by-step:
- Remove the wheels: Use a T-tool to loosen the bearing nuts, and then remove all four wheels.
- Pry out the bearing: Remove the wheel from the bracket axle. Using a bearing remover or flathead screwdriver, carefully pry the bearing out of the wheel. There are usually two bearings per wheel.
- Remove the dust cover (if present): If your bearing has a removable rubber dust cover, gently pry it open with a needle or knife. This allows the cleaning agent to better penetrate the bearing.
- Soaking the bearing: Place the removed bearing (without the dust cover) into a small container and pour in enough isopropyl alcohol or a specialized cleaner to completely submerge it. Gently shake the container for 5-10 minutes to allow the cleaner to dissolve the dirt and old lubricant inside.
- Thoroughly dry: Remove the bearing from the cleaning solution and shake off any excess liquid. Then wipe it dry with a paper towel and place it in a well-ventilated area to air dry, or use a hairdryer on a low heat setting to quickly dry it. Ensure the bearing is completely dry with no residual moisture.
- Add lubricating oil: Add 1-2 drops of light lubricating oil to each bearing. Gently rotate the bearing to distribute the lubricating oil evenly onto the internal balls.
- Reassembly: Replace the dust cover (if it was removed previously), and then reinstall the bearing into the wheel. Finally, put the wheel back on the bracket and tighten the bearing nut (not too tight; the wheel should be able to rotate freely without wobbling).
An important warning: Never use WD-40 on bearings. Although WD-40 is a lubricant, it contains solvents that will strip away the bearing’s natural grease and accelerate metal corrosion, ultimately shortening the bearing’s lifespan. Please use specialized bearing lubricants or light machine oils.
When to replace bearings:
- The bearing still made a grinding sound after cleaning.
- The bearing’s internal balls show obvious signs of rust → Replace immediately.
- The bearing feels “loose” or its ABEC rating has dropped.
- A set of high-quality bearings typically costs between $10 and $30.
Water Damage Agreement: If you unfortunately skate in the rain or your board gets wet, be sure to remove the bearings on the same day, dry them thoroughly, and relubricate them. Do not leave wet bearings on the board, as they will rust rapidly within 24-48 hours, causing permanent damage.
By the way, if you’re interested in wheel-ground contact feedback (such as the differences caused by different wheel shapes and hardness), you can read our other blog post: Longboard Wheel Contact Feedback .
Wheel maintenance and replacement — How to double the lifespan of your wheels
Many skaters replace their wheels much earlier than necessary—simply because they don’t rotate them regularly!
Wheels are the only part of the longboard that contacts the ground, and they wear down with your skating habits.
Signals that wheels need “attention”:
- Flat spots: The wheels make a rhythmic “thump” sound or vibration with each rotation (usually caused by locking the wheels during sudden braking or drifting).
- Coning wear: One side of the wheel wears more than the other (usually caused by always turning in the same direction or using the same foot to push off the ground).
- Chunking: Small pieces of material fall off the edge of the wheel (more common on new square-edged wheels when used roughly).
- The size has been significantly reduced: the wheel diameter is more than 5 millimeters smaller than when it was new.
Rotate your wheels (significantly extend wheel life):
Regularly rotating your wheels is the most effective way to extend their lifespan. This helps to balance the wear and tear caused by your dominant foot pedaling and cornering patterns.
- Method: Every 2-3 months, rotate your four wheels front to back and left to right. This means moving the left front wheel to the right rear wheel, the right front wheel to the left rear wheel, and so on.
- Procedure: Remove all four wheels and reinstall them in their new positions.
When to replace wheels:
- The flat spots cannot be smoothed out on their own after 2-3 slides.
- The wheel diameter has been significantly reduced, affecting the gliding experience.
- The edge chipping was severe, causing a bumpy ride.
- The wheels have become less stiff and feel harder than before.
- A high-quality set of replacement wheels typically costs between $20 and $50.
How to change sandpaper
Sandpaper isn’t just for aesthetics; its most important function is to prevent your feet from slipping off the board when pushing off, turning, and braking.
Worn sandpaper not only affects the riding experience but also poses a safety hazard.
Signals that the sandpaper needs to be replaced:
- The surface feels smooth to the touch, rather than rough and grippy.
- Your feet will slip during normal gliding.
- There is obvious peeling at the edges.
- Tears or holes appear on the sandpaper.
How to remove old sandpaper:
- Heating the edges: Using a hairdryer, heat the edges of the sandpaper for about 30 seconds (per area). The heat will soften the adhesive on the back.
- Peel off slowly: Start from one corner and slowly and evenly peel off the sandpaper. If you encounter resistance, reheat it.
- Remove residual adhesive: Wipe the board surface with isopropyl alcohol and a clean cloth to remove any remaining adhesive. Ensure the board surface is clean and dry.
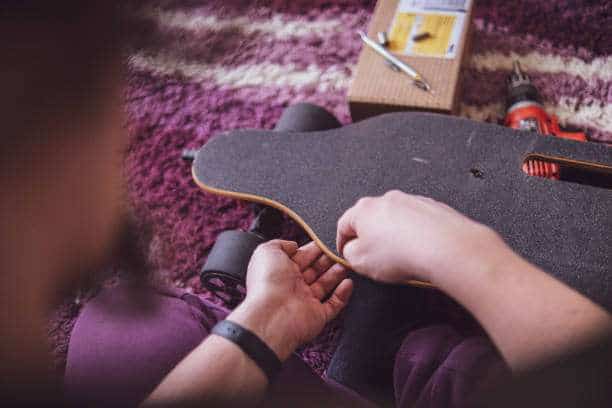
How to apply new sandpaper:
- Clean the board surface: Ensure the board surface is completely clean, dry, and free of dust or grease.
- Peel off the backing: Starting from one end of the new sandpaper, carefully peel off a small section of the backing.
- Center-outward pasting: Align the peeled-off sandpaper with the center of the board and gently press it in from the center outwards. Press continuously with your hand or a clean cloth to expel air bubbles.
- Press the edge: Ensure the edge of the sandpaper is in close contact with the board surface.
- Scratch: Use the edge of a T-tool or a coin to rub along the edge of the board to leave a clear outline on the sandpaper.
- Trimming: Fold excess sandpaper to the edge of the board, then carefully trim along the outline you’ve drawn with a craft knife. Be steady and ensure the edges are neat.
Changing sandpaper may sound like a big project, but it’s actually just a pleasant Saturday afternoon project.
Panel maintenance — Protect your most expensive components
Your longboard deck, especially our BuyLongboard Canadian maple deck, is the most expensive and crucial part of the entire board.
Protecting it from damage is of paramount importance.
Main threats to Canadian maple veneer:
- Water/Dampness: This is the number one killer of board surfaces! Water can cause delamination, which is the separation of the layers between the boards. Once this happens, the strength of the board will drop significantly.
- Impact damage: Falling or hitting a curb may cause the edge of the slab to chip or crack.
- Ultraviolet radiation: Prolonged exposure to sunlight will cause the pattern on the board to fade and weaken the surface sealant.
How to protect your board surface:
- Never slide on wet or slippery surfaces. Slippery surfaces are not only dangerous, but water is also a major enemy of the slab.
- If it gets wet in the rain: immediately dry the board with a towel and store it indoors, away from moisture. Never store a wet board in the trunk of a car or in a garage with large temperature fluctuations.
- Proper storage: Place the long board horizontally on a wall-mounted bracket or a flat shelf. Avoid placing it at an angle against a wall for extended periods, as this may cause the board surface to gradually warp.
- Regular sealing: If you live in a humid area, you can apply a layer of board sealant or wax to the edges of the board every 6 months to increase waterproof protection.
Signs of delamination on the board surface:
- Visible bubbles or separation between layers appear at the edges of the board.
- When tapped, some areas of the board make a hollow sound (a healthy board should make a solid sound).
- The board surface is unevenly curved in different areas.
Early delamination: Sometimes it can be repaired by re-gluing with wood glue and clamps.
Severe delamination: If the delamination area is large (more than 5 cm), or stress cracks appear on the board, then for your safety, it is time to consider replacing the board.
Hardware check – a 2-minute monthly routine
“Hardware” refers to the eight bolts that secure the bracket to the board.
This simple check, which takes only two minutes each month, effectively prevents the bracket from shifting during gliding, ensuring your safety.
Signals that hardware needs “attention”:
- When gliding, I feel the support shift (the bolts are loose).
- There was a “click” sound at the connection between the panel and the bracket.
- The bolt heads showed obvious signs of rust.
How to check:
Using your T-tool, check all 8 bolts one by one. Make sure they are tightened (but not overtight—just enough to feel secure).
Perform this simple check monthly to give you peace of mind while gliding. A complete set of hardware bolts typically costs between $3 and $8, making them affordable and easy to replace if necessary.
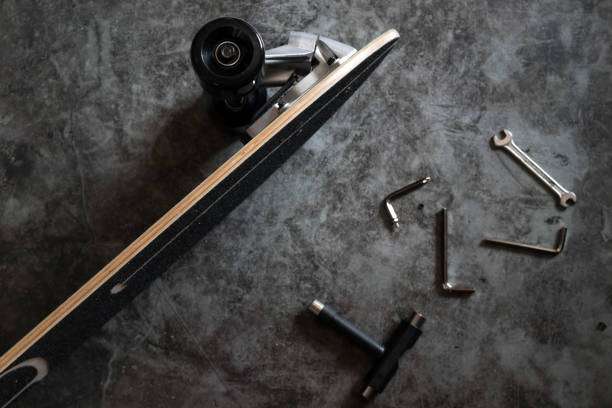
Longboard Maintenance Toolkit — What do you really need?
You don’t need a toolbox full of tools to maintain your longboard. In fact, you probably already have most of the tools, or they are easily available at a low price.
The tools you really need:
- Skateboard T-tool: This is your maintenance partner! It can help you adjust the frame and remove the wheels.
- Isopropyl alcohol (91% or higher): Used for cleaning bearings.
- Speed Cream or Light Machine Oil: Used for bearing lubrication.
- Hair dryer: Used to remove old sandpaper.
- Utility knife: Used to trim new sandpaper.
Optional but very useful tools:
- Bearing remover: Easier and safer to remove bearings than a flathead screwdriver.
- Replacement shock absorbers: Priced between $5 and $15, it’s good to have a set on hand just in case.
In addition to your T-tools, purchasing a complete maintenance kit typically costs between $20 and $40. It’s a small investment that can provide your longboard with years of smooth gliding.
Frequently Asked Questions
We know you may still have some questions about longboard maintenance. Don’t worry, we’ve compiled some of the most frequently asked questions and answers for you:
Q: How often should I clean my bearings?
Q: Can I skate my longboard in the rain?
Q: My wheels are making a “clattering” sound, what’s wrong?
Q: How long will longboard wheels last?
Q: My skateboard feels wobbly at high speeds. Is it a problem with the bracket?
Q: How do I know when to replace parts and when to repair?
Q: What is the best way to store long planks?
A well-maintained longboard not only provides a better riding experience and greater safety, but it can also last longer. These six seemingly tedious maintenance habits might not even take an hour a year in total—but they are precisely what determine whether a longboard will only last two years or accompany you for eight!
At BuyLongboard, we not only provide you with high-quality whole boards, but we also want you to make the most of them and enjoy riding for a long time.
If your board needs an upgrade, or if you’re considering buying a brand new longboard for 2026, feel free to visit our online store .
And don’t forget, your board deck and hangers come with a 1-year warranty for the first year—so you can ride without worry!